
Control Panel
Open the Virtualizor panel from billing or directly, and find your way around it.
VPS, Semi-Dedicated and VPS Reseller services are managed in Virtualizor, at vps.apexcloud.cc. It is a separate system from your Billing Panel account (billing), with its own login. There are two ways in. Reseller customers get extra Cloud menus to create VPS from their resource pool, see VPS Reseller.
Billing language
The billing panel is in Portuguese by default. Use the language selector at the top of the page to switch to English. The steps below use the English names.
Option 1: from billing (no password needed)
This is the quickest way, and it works as long as the service is active.
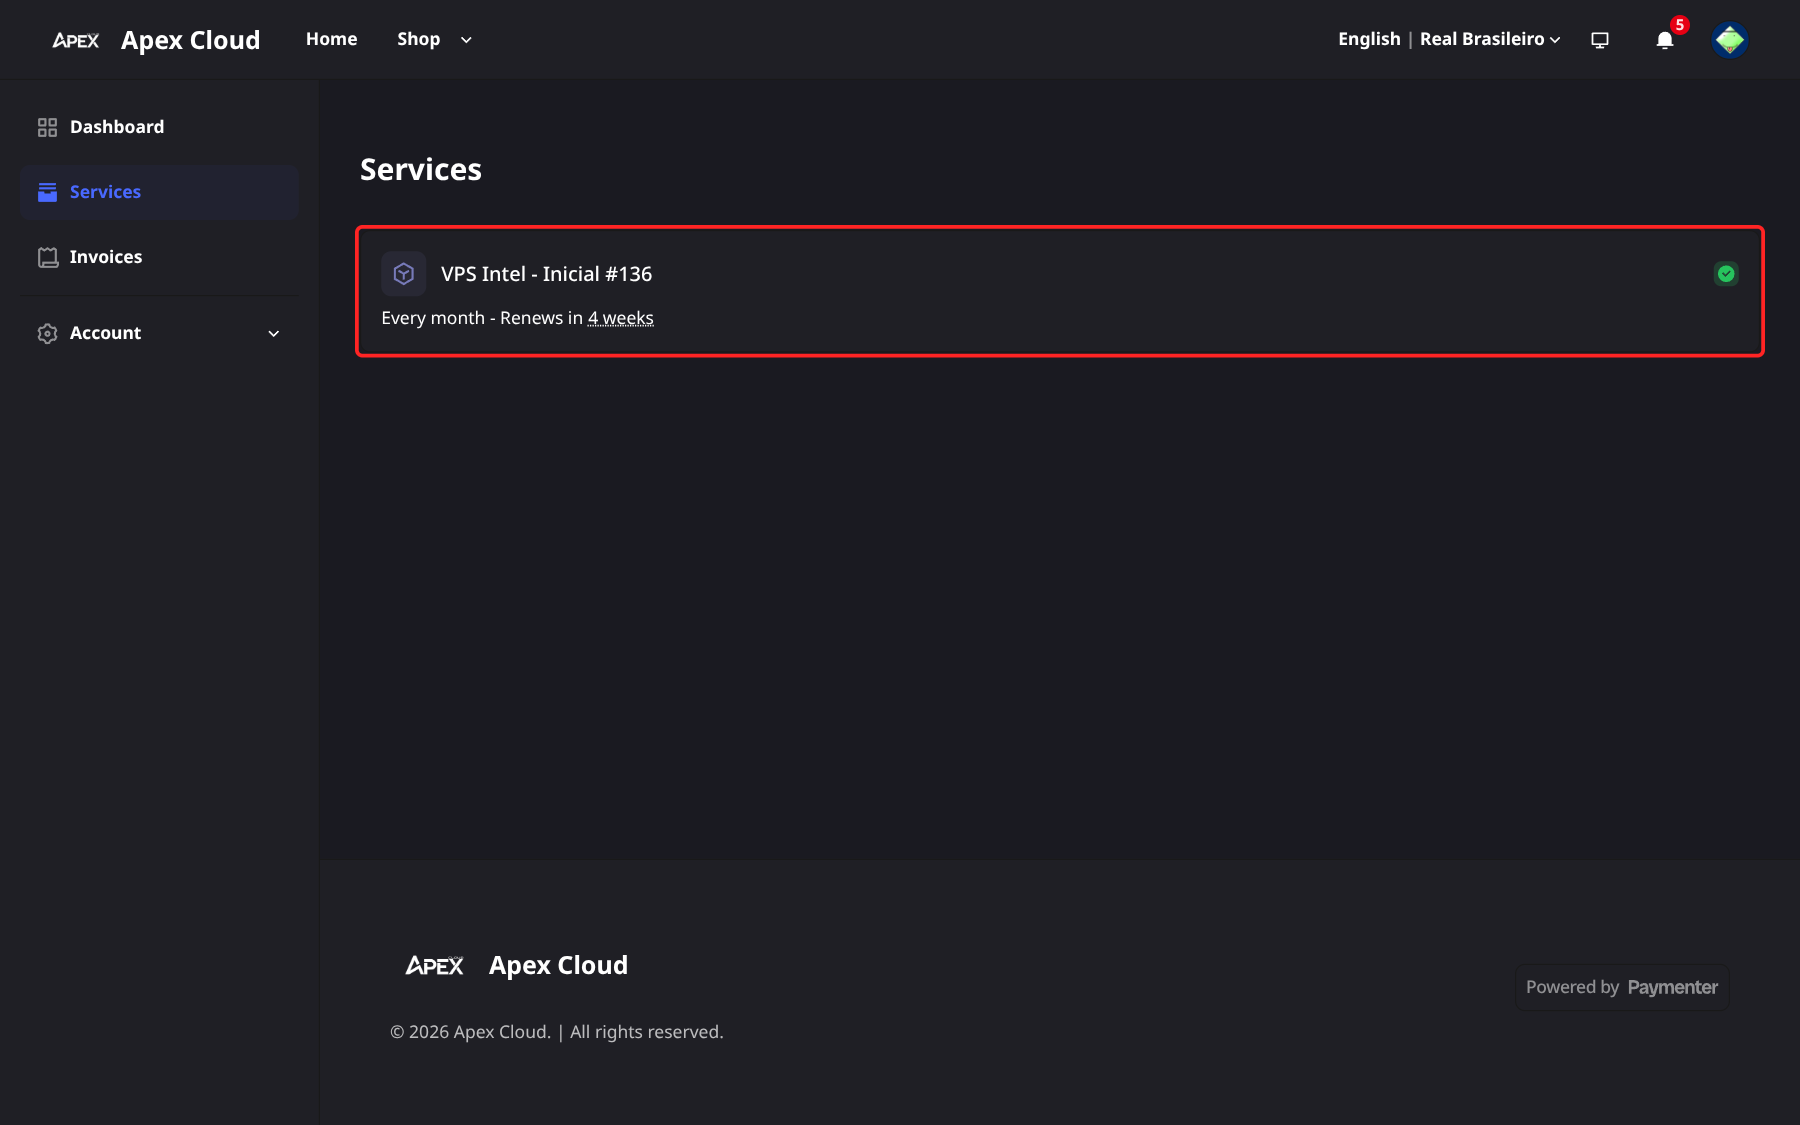
Open your services
Log in to billing.apexcloud.cc and open Services in the left sidebar. Click the VPS service you want to manage.
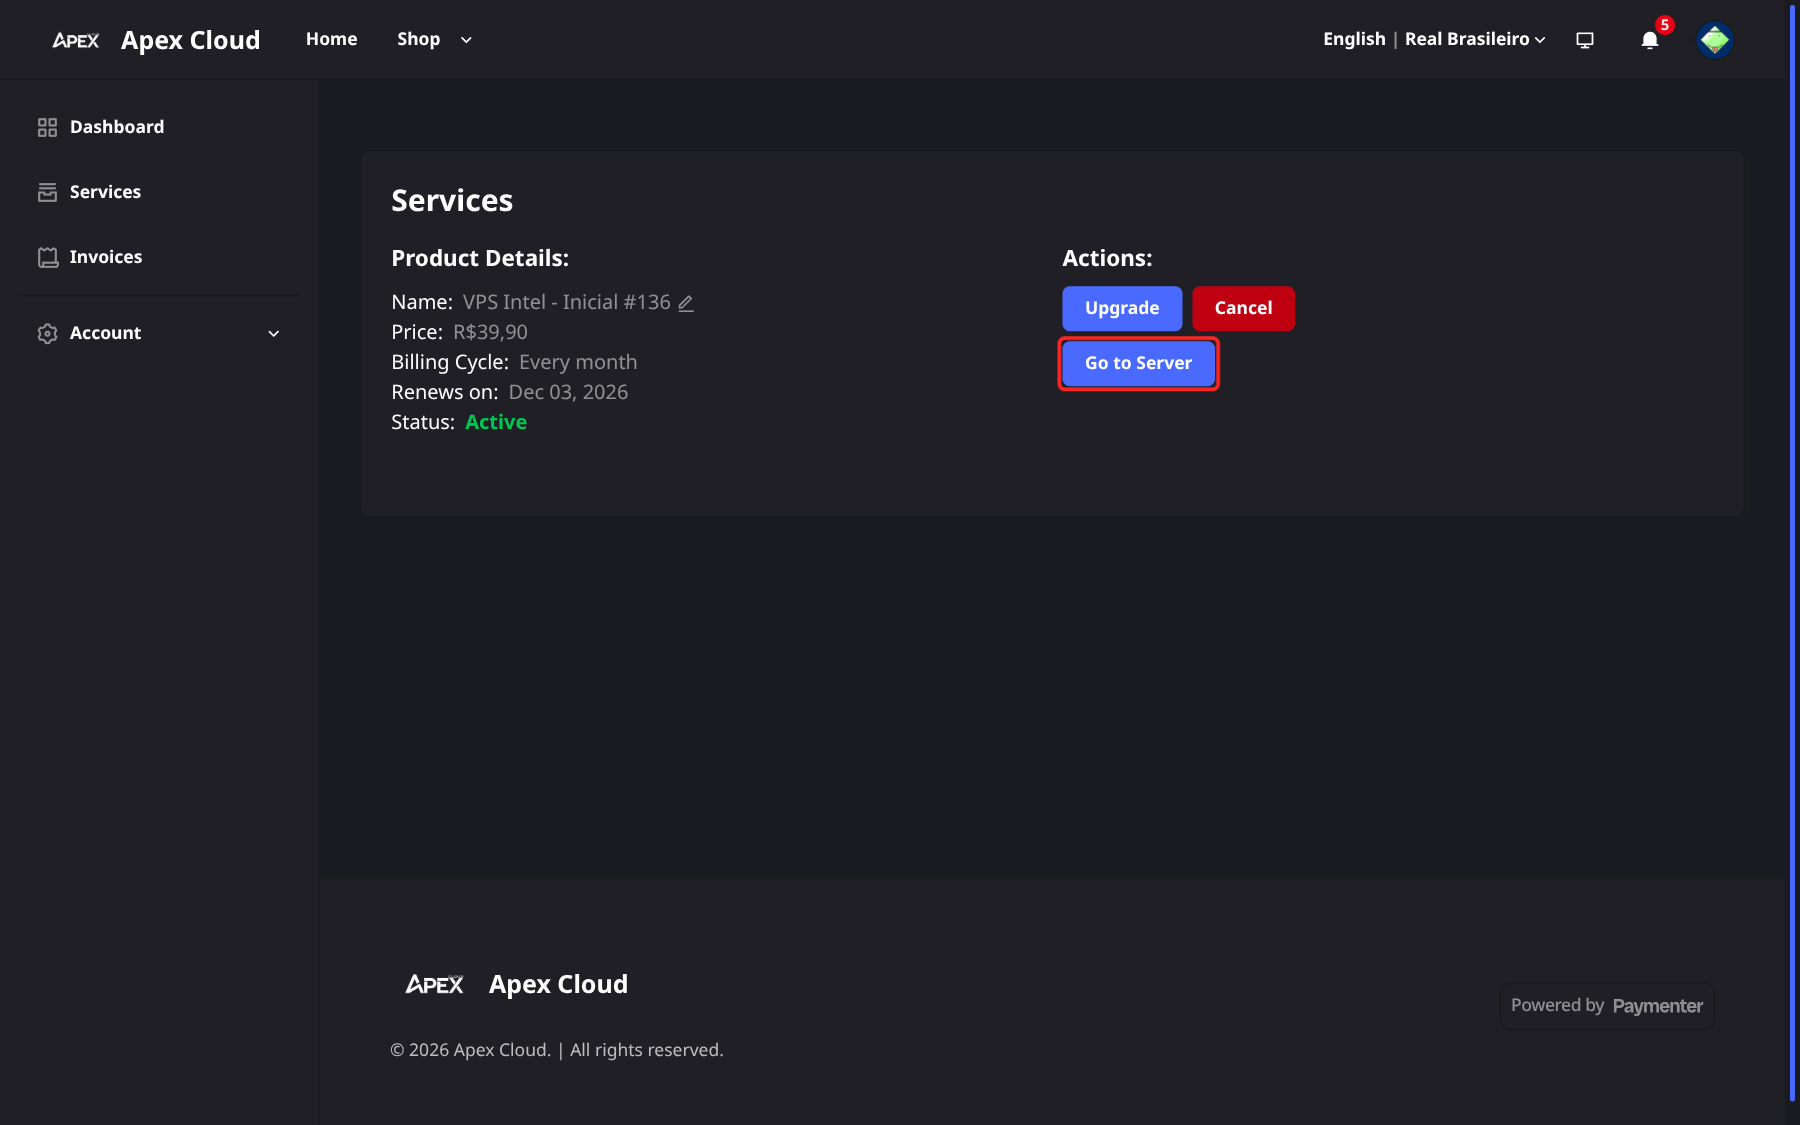
Click Go to Server
On the service page, under Actions, click Go to Server. Virtualizor opens already logged in to that VPS.
Option 2: log in directly
You can also go to vps.apexcloud.cc and log in with your email and a password.
The provisioning email from virtualizor@systems.apexcloud.cc contains the credentials for this login. If you do not have them, or you want your own permanent password, use Forgot Password:
- Open the Forgot Password page.
- Enter your email address and click Send Link.
- Open the link you receive and choose a new password.
From then on you can log in directly with that email and password, without going through billing.
Two-factor authentication
Two-factor authentication is not available in Virtualizor. The 2FA page is not accessible for customer accounts. Your billing account does support it, see Security.
List VPS
After you log in, the Dashboard shows your running and total VPS, bandwidth used and recent activity. Open List VPS under Compute in the left sidebar to see all your servers.
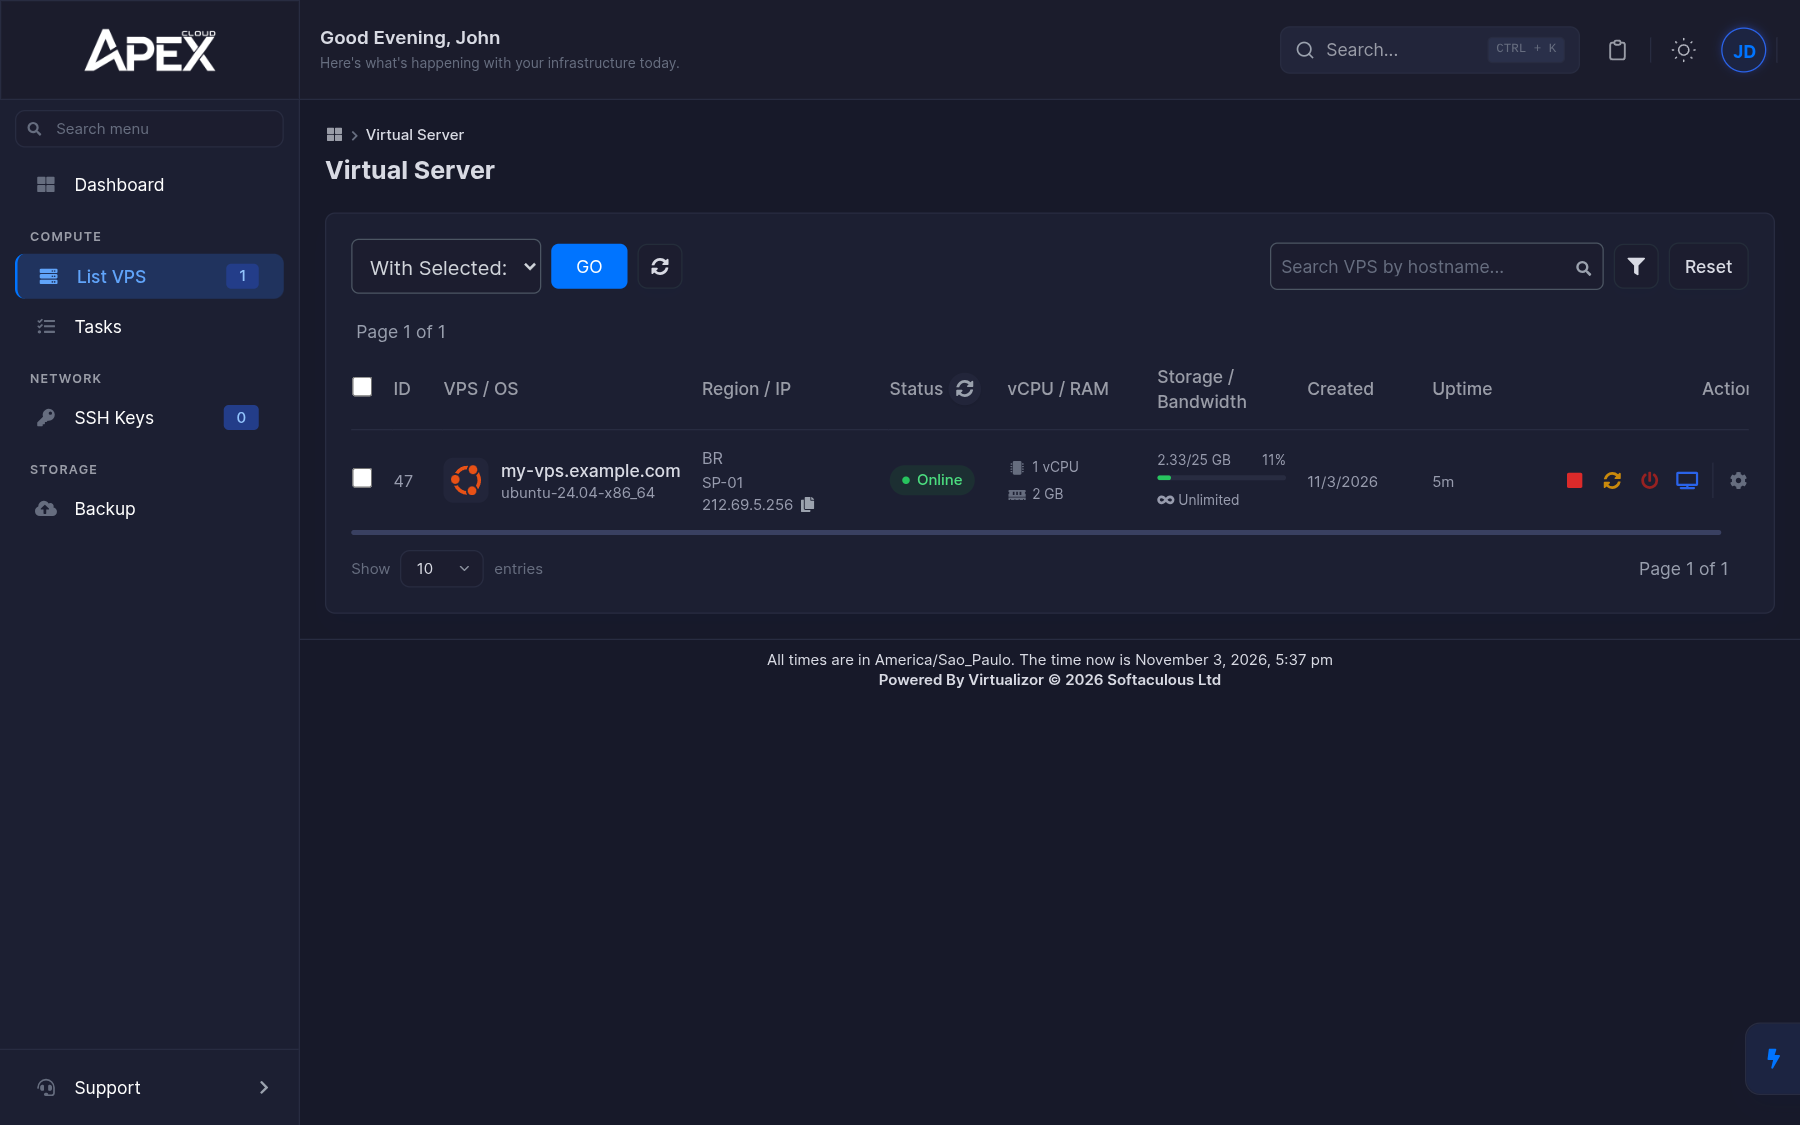
Each row shows:
- ID, the hostname and the OS template.
- Region/IP: the region (BR, SP-01) and the public IP address. Use the copy icon next to the IP to copy it.
- Status, for example Online.
- vCPU/RAM and Storage/Bandwidth.
- Created and Uptime.
- Action icons: Stop VPS, Restart VPS, Poweroff VPS, Launch NoVNC viewer and Manage. See Power controls and Console and rescue.
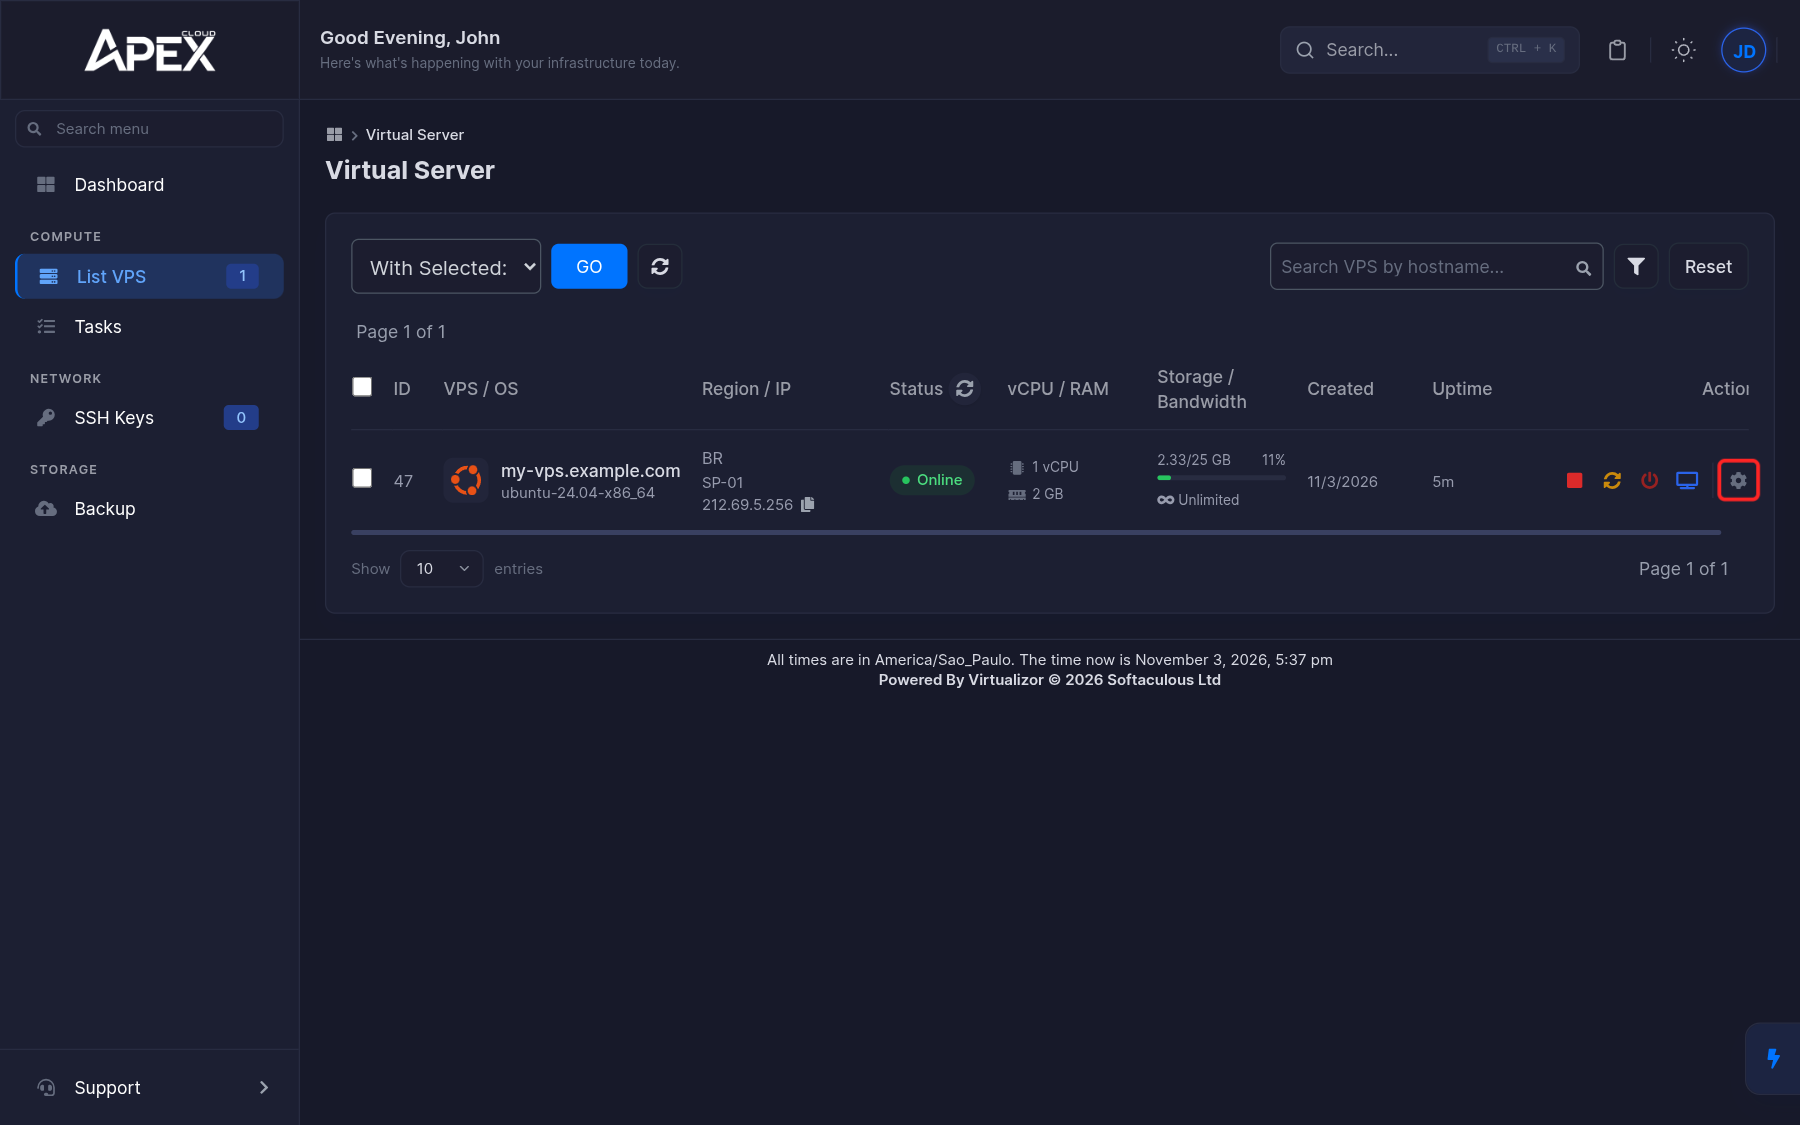
To open the management page for a server, click the cog (Manage) icon at the end of its row.
The With Selected menu runs Start, Stop, Restart or Power Off on several selected servers at once.
The management page
The header shows the hostname, status, OS and IP address, with the Stop, Restart, Power off and VNC buttons at the top right.
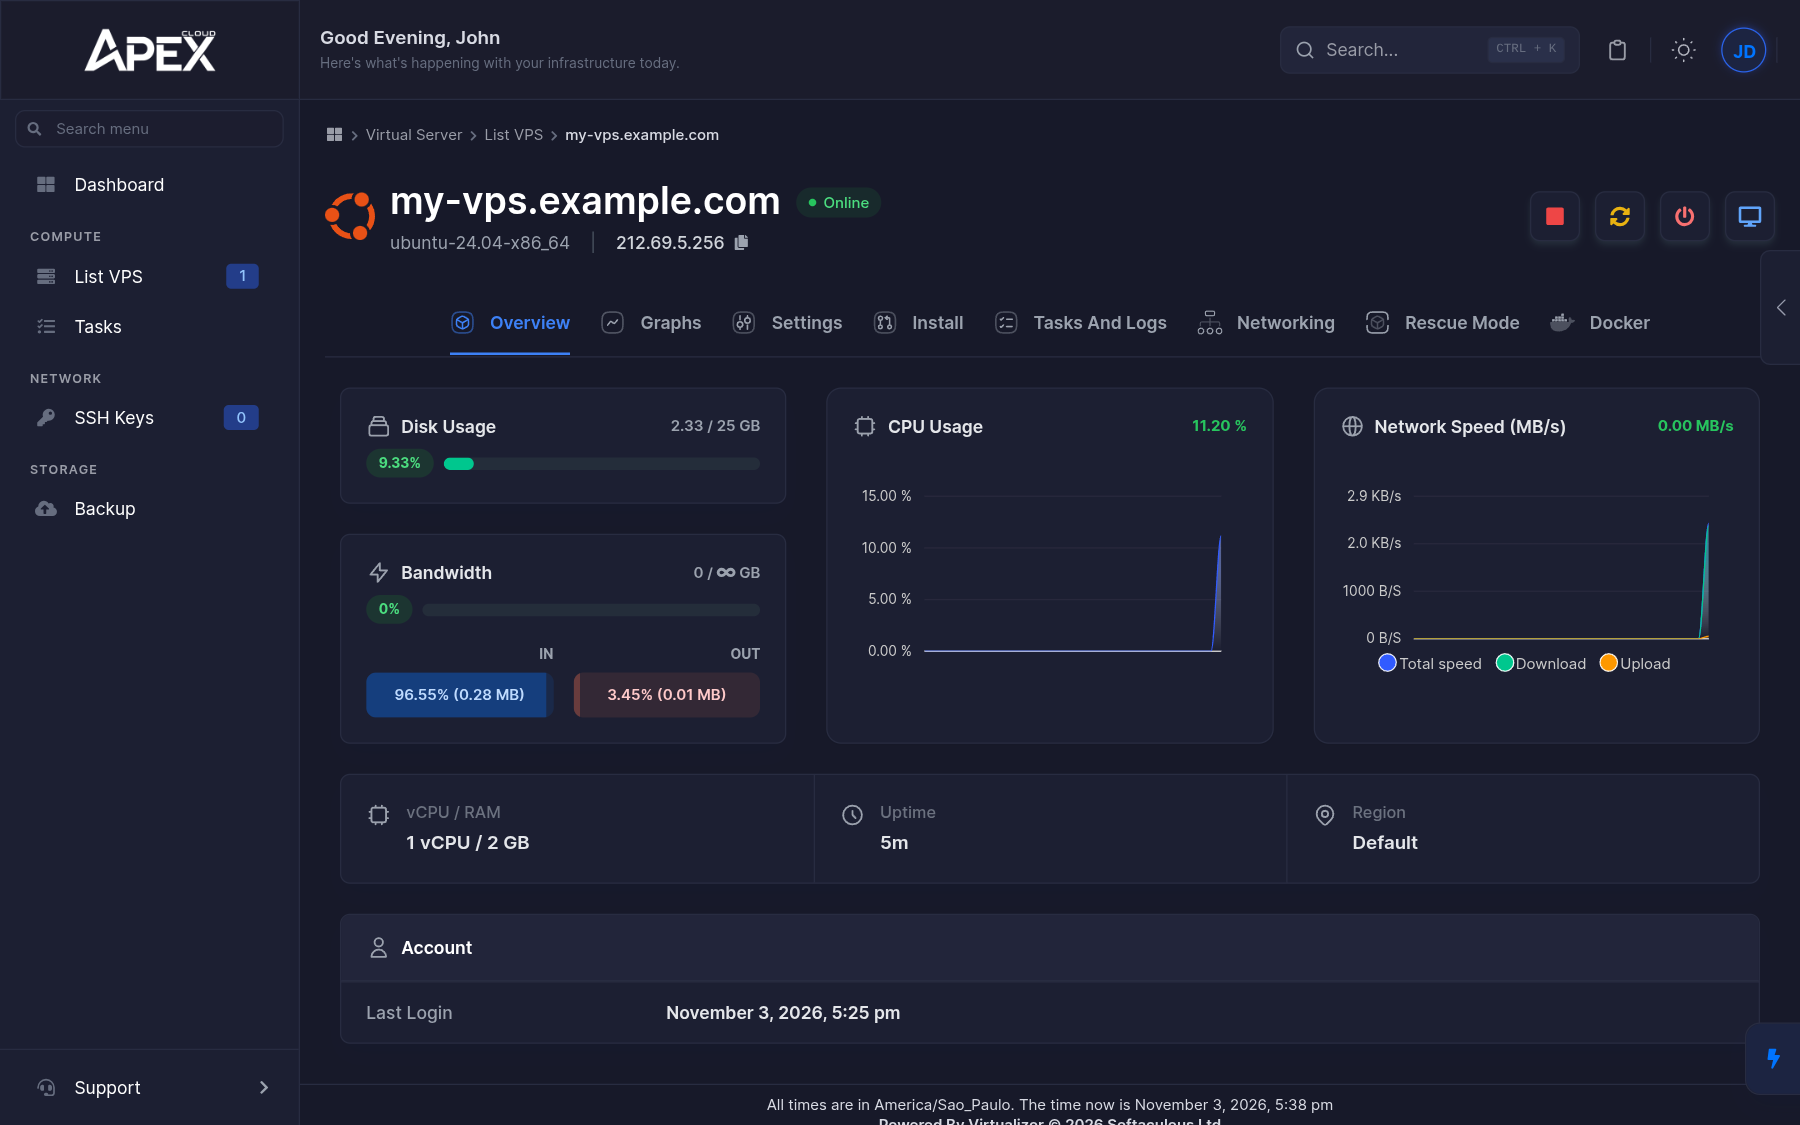
| Tab | What it is for |
|---|---|
| Overview | Disk usage, bandwidth, CPU usage, network speed, vCPU and RAM, uptime and region. See Monitoring. |
| Graphs | Bandwidth and system statistics over time. See Monitoring. |
| Settings | Change password, SSH keys, VNC and the hostname. |
| Install | Reinstall the OS and the Docker option. |
| Tasks And Logs | The history and progress of actions on this server. |
| Networking | Only shows VPC Network. |
| Rescue Mode | Boot a small Linux system to repair the VPS. See Console and rescue. |
| Docker | One-click Docker installation. See Reinstall the OS. |
Other panel pages
- Tasks (sidebar): actions across all your servers.
- SSH Keys (sidebar): keys you can attach to a VPS. See SSH keys.
- Backup (sidebar): lists backups, which you can filter by VPS. Keep your own backups as well, see who is responsible for what.
- Support (sidebar): links back to billing.
- Account (avatar menu, top right): your personal information, Account Password, and Settings where you can choose the panel language (Portuguese is available), your timezone and the VPS bandwidth threshold.
- API Credentials (avatar menu): create API keys for automation. This is an advanced feature and not covered in these docs.